Hardware
- Camera 1 - Panasonic AW-UE40KEJ 4K PTZ
- Cameras 2-4 - Panasonic AW-HE40SWEJ HD PTZ
- Cables (SDI, Ethernet)
- Panasonic remote camera controller AW-RP50
- Blackmagic ATEM TV Studio Pro 4K (video switcher)
- Datavideo NVS-34 streaming encoder
- PC - for connecting to Facebook, etc.
- tp-link PoE+ switch TL-SL1218MP
- Blackmagic video assist 7“ 12G HDR (combined scope/monitor/recorder/viewfinder)
Schematic diagrams
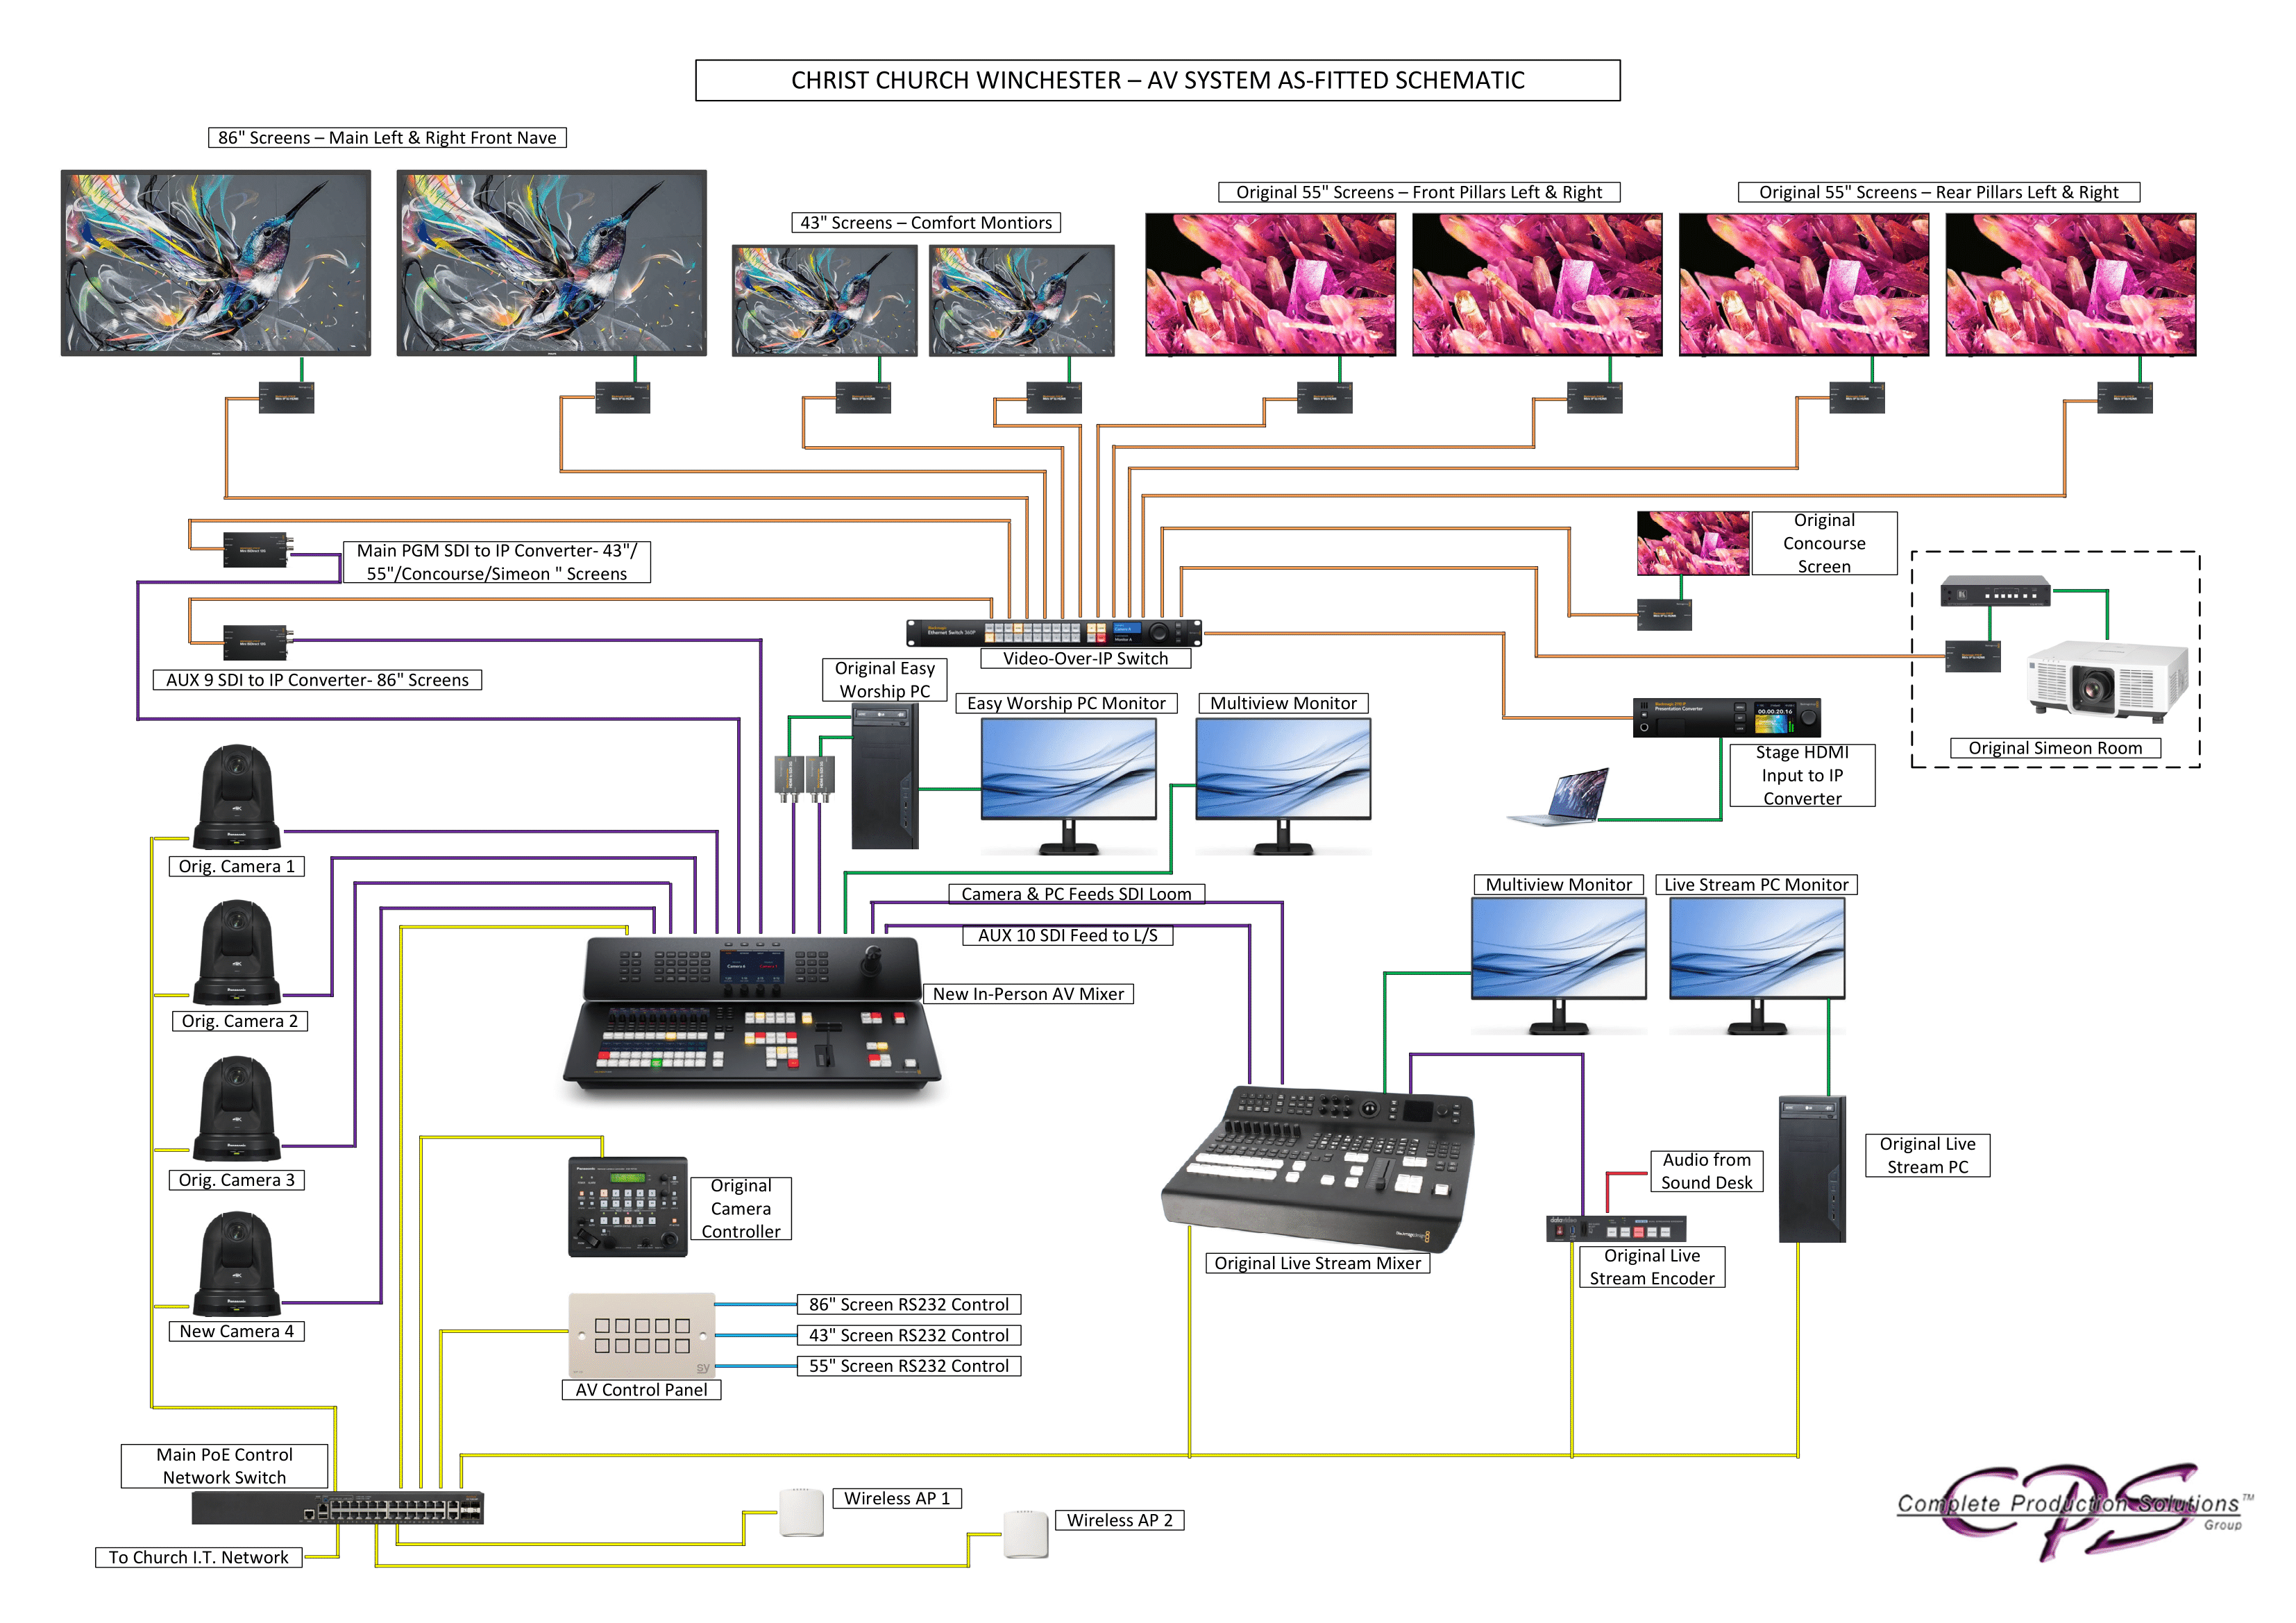
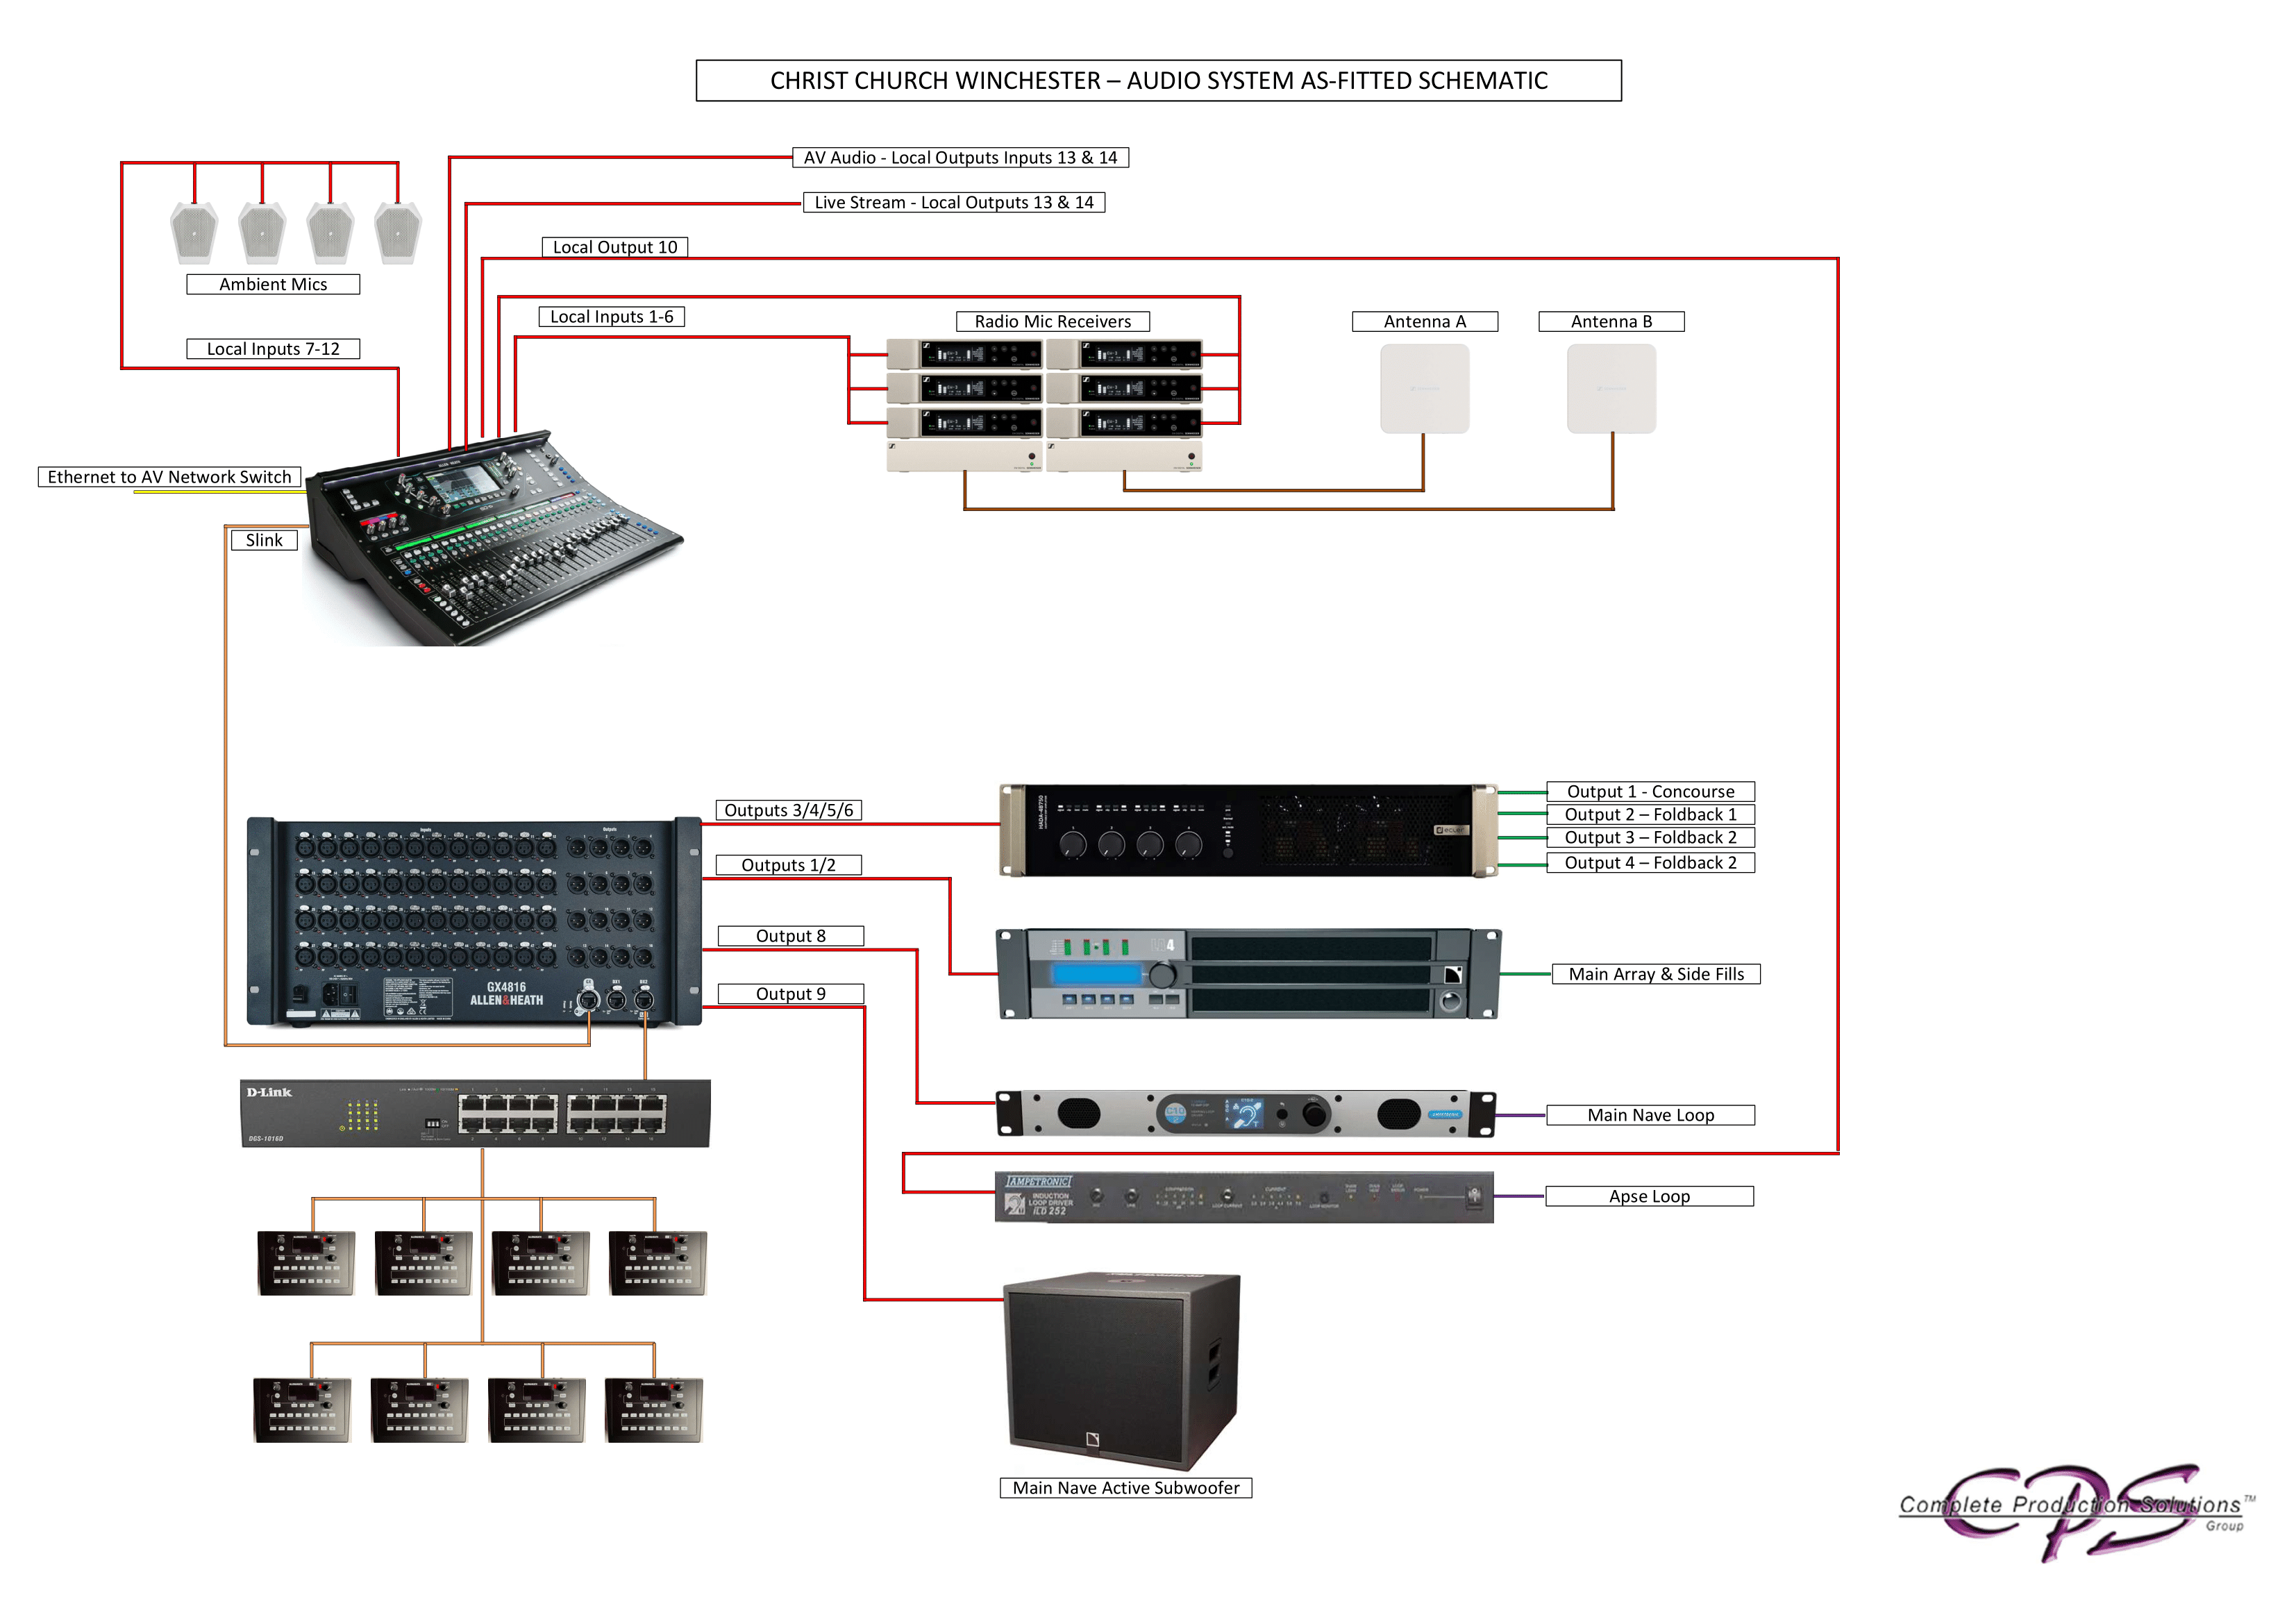
The following AV and audio schematic diagrams show how the system was wired after the ABCDE refurbishment in 2025.
 Click here to display the image full size.
 Click here to display the image full size.
Since installation, the following changes have been made:
- The audio feed from the sound desk is now connected to the live streaming Blackmagic video switcher (ATEM), rather than directly into the encoder, so the live stream audio can be monitored and controlled by the live streaming operators. (details)
- An SDI cable connects the aux output of the live streaming Blackmagic video switcher (ATEM) to an input of the AV Blackmagic video switcher, so the live stream can be displayed on screens in church. (details)
Blackmagic video assist 7“ 12G HDR
The “scope” that’s in the live streaming desk drawer can be used for setting the colour and white balance of cameras.
Disconnect the SDI cable connected to the aux output of the live streaming Blackmagic ATEM. Connect another SDI cable from aux output of the live streaming ATEM to the SDI input of the scope, plug in and connect the power adapter, and power on.
To set the cameras up you need to select the vector scope on the Blackmagic Video Assist, and then black balance all the cameras first (close all the iris’s down) and then go through each camera ensuring that the dot on the vector scope is dead centre.
Then to white balance, put a white cloth on the stage and point all the cameras at that so nothing else is in shot (this is the only time it’s okay to use digital zoom!), and use the Auto White Balance (AWB) button on the camera controller. That should line up all the cameras and again, put the dot dead centre on the vector scope. If it doesn’t on some cameras that is where you’ll need to adjust the colour bias on each camera.
When you are done, please reconnect the original cable to the aux output of the ATEM.